ICB Orthotics
| PRODUCT NAME | PRODUCT CODE | SIZES | DESCRIPTION | INDICATION | ||||
Blue Orthotics For Medium Pronation |
I-BU00(20-25) (Full Length Without Cover) I-BUC00(07-16) (2/3 With Cover) I-BUC00(20-26) (Full Length With Cover) |
Junior – XL (Full Length) Toddler-XXL (2/3) |
Blue, Medium density EVA Orthotics. Available in Full length & 3/4 (2/3) Length. Available both uncovered and covered. | These Orthotics are specifically designed to suit the standard patient who exhibits medium pronation. They are great for general use in patients weighing 55kg-75kg. | ||||
White Orthitics For Mild Pronation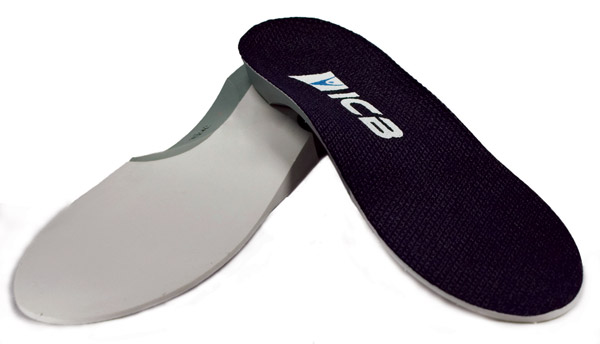 |
I-WH00(20-26) (Full Length Without Cover) I-WHC00(10-15) (2/3 With Cover) I-WHC00(20-26) (Full Length With Cover) |
Junior-XXL (Full Length) Junior-XL (2/3) |
A soft density EVA that provides mild pronatory control. Available in Full Legnth and 3/4 (2/3) Length. Available both Covered and Uncovered. | ICB’s White orthotics are specially designed for patients suffering from a mild pronation. Diabetics, Geriatrics (including Arthritis sufferers) and works great for patients weighing less than 50kg. | ||||
Sports Orthotics |
I-DL00(10-16) (2/3 Without Cover) I-DL00(20-26) (Full Length Without Cover) |
Junior – XXL | Orthotic consisting of both a firm and medium density EVA. Available in Full length and 3/4 length. Only available in uncovered. | The ICB SPORT DUAL DENSITY orthotics are designed specially for active patients involved in high performance sporting activities. Its is also great for use with any patient that requires more support in the heel and arch areas. | ||||
Green Orthotics For Severe Pronation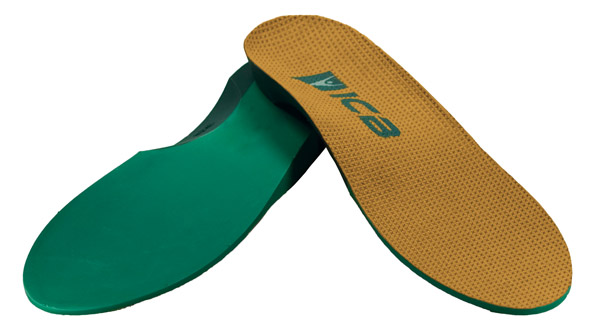 |
I-GNC00(10-16) (2/3 With Cover) I-GNC00(20-26) (Full Length With Cover) |
Junior-XXL | Firm Density EVA Orthotic. Available in Full length and 3/4 length. Only available in the Covered style. | ICB’s Green orthotics are specifically designed to treat patients with severe pronation and its pronatory effects. They are ideal for athletes, highly active patients and for people weighing over 90kg. | ||||
High Heel Orthotics |
I-HHC00(31-34) (With Cover) | XS-L | Extra Thin Medium Density EVA Orthotic. Most effective when used in low heel and high heel court shoes. | ICB high heel orthotics are purpose built to fit into ladies high heel fashion footwear, they feature a 3° rear foot varus post and exhibits the same triangular shaft element found in the rest of the ICB orthotics range. | ||||
Dress Style Orthotics |
I-DL00(42-45) | S-XL | Same as the dual Sport Orthotics, but with Lateral Border Removed. Available in full length and 3/4 length. | Used in patients with very broad feet, as foot can naturally splay without any irritation on the lateral sides. Can also fit into narrow fitting shoe styles. Offers excellent rearfoot and arch support. | ||||
Multicolour Orthotics For Kids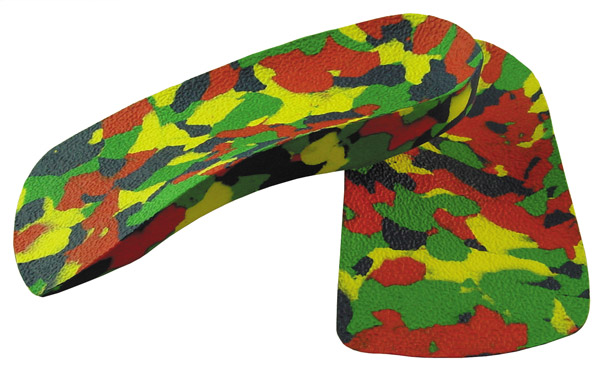 |
I-MT00(07-11) (2/3 Without Cover) I-MT00(17-21) (Full Length Without Cover) |
Toddler-XS | Constructed from a Medium density EVA, providing children with biomechanical support and control. Available Full length and 3/4 (2/3) length. | ICB’s multicolour orthotics are specially designed for young children with excessive pronation. They are generally used for children aged 3-12 years. | ||||
ICB Children’s High Flange Orthotic |
I-MTF00(07-11) (2/3 Flange Without Cover) | Toddler-XS | ICB Children’s High Flange Orthotics are purposely designed with an intrinsic 35mm medial flange, 25mm lateral flange and heel cup, coupled with a 5° rearfoot varus posting, to realign the calcaneus and provide extra support to the medial arch, resulting in improved balance and control. | The Children’s High Flange Orthotics are particularly useful when treating children with Hypermobility & mild Cerebral Palsy, and being made from 100% medium density EVA, it’s easy to heat mould and customise. | ||||
Met Domes |
I-DOME-(01-02) | S & L | 100% EVA Metatarsal Dome ; |
Designed to lift the traverse arch and spread the metatarsals, helping to relieve the symptoms of metatarsalgia, pinched nerves and neuromas. | ||||
Extended Heel Lift |
I-EHL10-(01-03) (10mm) I-EHL15-(01-03) (15mm) |
S-L | 100% EVA Extended Heel Lift. Available 10 & 15mm. | For leg length discrepancy. When a raise of more than 8mm is required. | ||||
Forefoot Wedges |
I-FFT-(04/06) | 4 & 6 Degrees | 100% EVA Forefoot Wedge. Available in 4 & 6 degrees. | Used for treatment of Valgus and Varus Conditions. Used as a Morton’s extension for Hallux Limitus. | ||||
Heel Lift |
I-HLL-(04/06/08) (Large) I-HLM-(04/06/08) (Medium) I-HLS-(04/06/08) (Small) |
S-L | 100% EVA Heel Lift. Available 4, 6 & 8mm. | For leg length discrepancy. Treatment of the structural short leg. | ||||
Medial Flange  |
I-MFF-(01/03) (Firm) I-MFS-(01/03) (Soft) |
S & L | 100% EVA Medial Flages. Available in two sizes and two densities, soft and firm. | Attached to dorsal surface to provide extra comfort and support. | ||||
Rearfoot Wedges |
I-RF-(02/04) | 2 & 4 Degrees | 100% Rearfoot Wedge. Available 2 & 4 degrees. | Used to reduce patients pronation over the arch of the orthotic and to increase the inversion of the orthotic when moulding to NCSP. | ||||
Medial Longitudinal Arch Block |
I-MLAB-(01-03) | S-L | Low density EVA Medial Arch Infill. | Used to reinforce the arch of any ICB Orthotic to provide additional medial longitudinal arch support, while maintaining the comfort of the orthotic in the rearfoot and forefoot. | ||||
6 Degree Inversion/Eversion Ramp |
I-IR6 | 6 Degrees | 32cm long EVA Inversion/Eversion ramp. | Used as eversion or inversion ramps or extended forefoot valgus/varus wegdes. | ||||
Goniometer |
I-ICBGON | N/A | The ICB Gravitiy Goniometer has a precision laser cut aluminium face dial and aluminium calipers which have been tumbled to smooth the edges. Supplied in a durable storage case. | Used by medical practitioners interested in treating tibial torsion in children and assessing soft tissue compensation. | ||||
| Protractor
|
I-ICBPROT | N/A | ||||||
| Ryobi Heat Gun
|
I-HEATGUN | N/A | ||||||


….
Fitting ICB Orthotics
Sizing Chart for ICB Orthotics

It is important that ICB Orthotics be fitted and moulded to the patient’s Subtalar Joint Neutral Position, which will assist in correcting and limiting excessive pronation. To find the subtalar neutral position you can use the ICB Anterior Line Method:
- 1. Locate the depression anterior to the medial malleolus by asking the patient to over pronate their foot.
- 2. Mark the depression
- 3. Repeat steps 1 & 2 for the lateral depression.
- 4. Bisect the lateral and medial depressions and mark the bisection.
- 5. Locate and mark the 2nd metatarsal head and join it with the bisection mark made in step 4.
- 6. Locate and mark a dotted line along the tibial crest to meet up with the bisection of the medial and lateral depressions.
- 7. To find subtalar joint neutral, ask the patient to roll their foot outwards – when the dotted line along the tibial crest down to the 2nd metatarsal head is straight, the foot is in the subtalar joint neutral position.

Heat Moulding ICB Orthotics
Before fitting the orthotic device ensure the patient’s shoes are in good condition. If they are badly worn, they should be replaced and any lining or insoles removed ICB Dual Density Heat Moulding orthotics are highly versatile in their application. ICB Orthotics can be custom fitted to the individuals’ foot contours:
- 1. Attach any forefoot or rearfoot additions (if required) prior to heat moulding.
- 2. With the patient seated, remove 1 of the orthotics from the footwear (the other orthotic must remain in the shoe and we worn also during the moulding process), and using a heat gun, apply heat to the device. It is best to hold the orthotic at the distal edge, and concentrate the heat on the plantar surface of the arch. Heat for 20 to 30 seconds, distributing the heat by making circular motions with the heat gun, until the words ‘left’ and ‘right’ appear to fade.
- 3. Insert the heated orthotic into the shoe and tie up any laces or fasteners on the shoe.
- 4. With the patient still seated locate the subtalar joint, and ask the patient to stand – with equal weight bearing.
- 5. Place the foot into the subtalar neutral position (if you have used the ICB Anterior Line Method markings as a visual guide). With your other hand apply pressure to the medial arch and rearfoot to ensure correct moulding. Hold this position for 30-40 seconds.
- 6. Ask the patient to sit down (whilst still maintaining your hand positions). Remove the moulded device and allow to cool for approximately 2 minutes (or until it is cool enough to touch). Then place the moulded orthotic back into the shoe, and repeat the process for the other foot.
- 7. If a heel lift or metatarsal dome is required, these should be added after the heat moulding process is completed.


Heat Moulding to a Plaster Cast
Using ICB Orthotic to mould to a plaster cast is also quick and easy. Being made of 100% EVA ICB Orthotics can save time over using sheet EVA, by reducing the amount of grinding and time required to create the desired orthotic shape.
Simply place the heated orthotic onto the plaster cast and use a vacuum former to mould into shape. ICB Orthotics can then be ground using a bench grinder, dremel or nail drill.

